Lighting a refugium in the deep opaque center chamber of a 29 gallon Biocube could prove to be somewhat of a difficult task. A typical overhead fluorescent would not reach the deepest parts of the fuge, nor would it look aesthetically pleasing. A submersible light may overheat the water creating temperature problems and takes up valuable space in the small rear compartments. To solve this problem aquarists choose many varied methods that have similar effects. For this nano a simple discreet approach was chosen.
This fuge light setup is cost effective and requires little to no major work. However it does require permanently scraping off the black paint on the Biocube's rear wall, and a trip to the local hardware store.
ANYWAYS...
How It's Done:
The second largest chamber of the cube was chosen to house the refugium. Based on size, practicality, and functionality this chamber seemed like the best choice.

Before worrying about any lighting a custom cut piece of eggcrate was added near the bottom of the second chamber (where the drip floor used to be). This eggcrate allows unhindered water flow while still keeping the cheato from being sucked up or pumped into the display. The eggcrate was cut precisely to the dimensions of 3.5 inches x 9 inches. At this size the eggrate could fit perfectly into the center chamber resting on the ridge provided with the cube's original design.
The next step was to find the parts to house the light as well as find an ideal candidate for the light itself. A

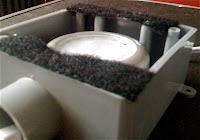
trip to the local hardware store warranted the purchase of a Xenon Puck Light, a single plastic electrical gang box, and some industrial Velcro (all for under 25$ CAN). When combined these three integral parts of the fuge lighting system provided an ideal setup. The puck light, which came with a standard extension cord and on/off switch fit perfectly into the gang box with

the cord coming neatly out the bottom ready to plug into any outlet. The Velcro was then applied easily on the top and bottom of the box. Due to the industrial strength of the Velcro, it was applied then instantly almost impossible to move.
The next step was to scrape a rectangular window into the black paint on the Biocube.

The rear wall of this Biocube aquarium is solid glass with a thin black coating to hide the interior workings of the rear chambers. With an exact-o-knife and a razor blade this thin layer of paint can be easily removed revealing a transparent sheet of glass. This window was measured and scaled to the gang box dimensions to prevent any possible light spilling out. Velcro strips were then applied to the top and bottom of this window.

Naturally the next step was to apply the light box onto the back of the tank and plug it in. It fit almost perfectly with enough space between the wall and the light box to remove and re-apply the unit (important for changing bulbs).
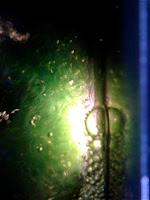
The setup works flawlessly and unless one looks behind the tank it is virtually impossible to notice. The subtle light penetrates the cheato at the center of the chamber allowing for unidirectional growth. When placed on a timer with an opposite schedule to the main display light this little fuge lamp not only helps regulate temperature, but it helps to avoid nighttime PH swings. This cheap alternative allows the application of a incredibly effective means of nutrient export (the use of macro algae) at a minimal amount of work.
In the long run this step will most likely become one of the most effective choices made when preforming the initial modifications to this 29g system.


No comments:
Post a Comment